Showing posts with label veggies. Show all posts

Wednesday, July 10, 2013

Raw Cucumber Beet Salad with Parsley

This salad was incredibly refreshing after a long day of dancing and is

packed with cleansing, delicious ingredients. It was very easy to make, apart from the shredding of the beet. My Zyliss julienne peeler did the job, but not without a fair amount of frustration on my part. The salad was worth the labor though!

Raw Cucumber Beet Salad with Parsley
By Caroline Mac

Ingredients:
1 large beet, peeled and shredded
1/2 large cucumber, diced
1/2 cup parsley, washed with stems removed

Dressing
1 T olive oil
1 1/2 t lemon juice
1/2 t balsamic vinegar
1/4 t tamari
1 clove garlic, minced
Lemon pepper to taste


Step 1: Combine all salad ingredients and stir until thoroughly mixed.

Step 2: In a separate bowl, whisk all dressing ingredients together. Drizzle over salad and mix until thoroughly coated.

You can serve this dish immediately, but I thought that it actually tasted better after a night in the fridge. Even a few hours would allow the flavors to blend more and the beets and cucumber to marinate in the dressing.


Enjoy!

~Caroline~

Friday, April 26, 2013

Fennel and Clementine Salad With Lemon Garlic Dressing

Since it's getting warmer outside, I've been craving more and more raw, fresh food instead of hearty warm dishes. The result? Salads galore. I usually have pretty much the same salad during the week- a combo of dark greens, mixed veggies and cottage cheese for protein. Even though I love this salad, I decided it was time to switch it up and make something a little more gourmet. I decided that fennel was the way to go. 
I love the taste of fennel. It's similar to black licorice, with a sweet flavor that is great raw or cooked. I thought that it would go especially well with tangy and sweet clementines topped with an acidic splash of lemon combined with savory garlic. 

Fennel and Clementine Salad with Lemon Garlic Dressing
By Caroline Mac

Makes 1 serving

Ingredients:
1/2 bulb of fennel, outer layer peeled and thinly sliced, some greens reserved for garnish

Approx. 1 cup salad greens of choice (I used Trader Joe's Power Greens)

1 clementine, peeled and broken into sections

1 t olive oil

1/2 t lemon juice

1/2 t apple cider vinegar

1/4 t minced garlic

1/8 t ground black pepper

1/8 t Penzey's Trinidad Lemon Garlic seasoning (You can use a combination of lemon pepper and garlic powder as well)


Step 1: Spread greens across the bottom of your dish to create a bed of lettuce.

Step 2: Place clementine sections around the edge of the greens. Create a tower of fennel in the center.

Step 3: Whisk oil, lemon, vinegar, garlic, and seasoning together until thoroughly blended. Drizzle over  the fennel. Garnish with fennel greens.


Enjoy! 

~Caroline~

Friday, March 29, 2013

Peanut Tofu and Avocado Spring Rolls

It's finally feeling like spring! I found it only appropriate to start the season off with spring rolls! Basically, I created two recipes- a broiled peanut tofu, and the spring rolls that it was encased in. These are great for parties, lunch boxes, or just as a quick and healthy snack.

Peanut Tofu and Avocado Spring Rolls
By Caroline Mac

Note: Allow plenty of time to prepare this, as the tofu takes a couple of hours to marinate.

Ingredients:
Peanut Tofu:
11 strips of extra-firm tofu, pressed (Strips should be about 1/2 inch thick)
1/4 c crunchy peanut butter
1 T soy sauce
1 T rice vinegar
2 t sesame oil
1t lime juice
1/8 t Penzey's Singapore seasoning
Just under 1/4 t stevia
4 drops sriracha hot sauce
1 t water

Wraps:
3/4 avocado, sliced into 11 slices
1 bag Trader Joe's Broccoli slaw (you won't use the whole bag)
11 small shitaki mushrooms, washed and dried
11 spring roll rice wrappers (you can get these in the Asian section of most supermarkets)


Step 1: Mix all ingredients for the peanut tofu together, except for the tofu, until thoroughly blended. Coat each slice of tofu in the sauce, place in an oven-safe dish and allow tofu to marinate for a couple hours.

Step 2: Broil tofu in the oven for approximately 6-8 minutes on each side, or until each side is golden and crispy. Allow to completely cool before making rolls.

Step 3: Prepare first rice wrapper as according to the package. Typically, you soak the wrapper in warm water for a few seconds until it becomes flexible, place it on a towel to dry, and wrap it around your filling.

Step 4: Place one piece of tofu, one mushroom, one slice of avocado, and a small bunch of slaw in the center of the wrapper.

Step 5: Fold over one side of the wrapper, making sure to keep the ingredients compact. Fold in the top and bottom of the wrapper and continue rolling it until the ingredients are securely inside.

Step 6: Repeat this process for the remaining 10 wrappers. Serve with a sauce of your choice. I've had them with both sweet and sour sauce and a peanut sauce. Both tasted great!


Enjoy!

Thursday, January 24, 2013

Lentil Grapefruit salad with Mint and Black Pepper Dressing

Easily the most beautiful dish I've ever created, this healthy salad is packed with flavor, has an excellent source of protein, and has a unique combo of flavors, which keeps things interesting. I've been on a major grapefruit kick lately, so having it in this salad made it even better. This works as a light meal, appetizer, or could be multiplied and served family-style.

Lentil Grapefruit Salad with Mint and Black Pepper Dressing
By Caroline Mac
Ingredients:
Single Serving
1 1/2 cups baby spinach
1/2 cup lentils, cooked, and packed in a small cup
1/2 grapefruit, peeled and separated into small wedges
4 mint leaves, shredded, 2 whole for garnish

Dressing:
1 T extra virgin olive oil
1/2 T lemon juice
1/4 t ground black pepper
pinch dried rosemary

Step 1: Whisk together all dressing ingredients until thoroughly blended. Set aside. You may want to whisk it up again before serving

Step 2: Spread spinach leaves at the bottom of a dish. Flip the cup of lentils onto the spinach base and slowly lift cup away, maintaining the shape of the lentils. Place grapefruit pieces evenly around the lentils.

Step 3: Sprinkle mint leaves over entire salad and drizzle with dressing. Top with two mint leaves for garnish.

Enjoy!


Thursday, January 17, 2013

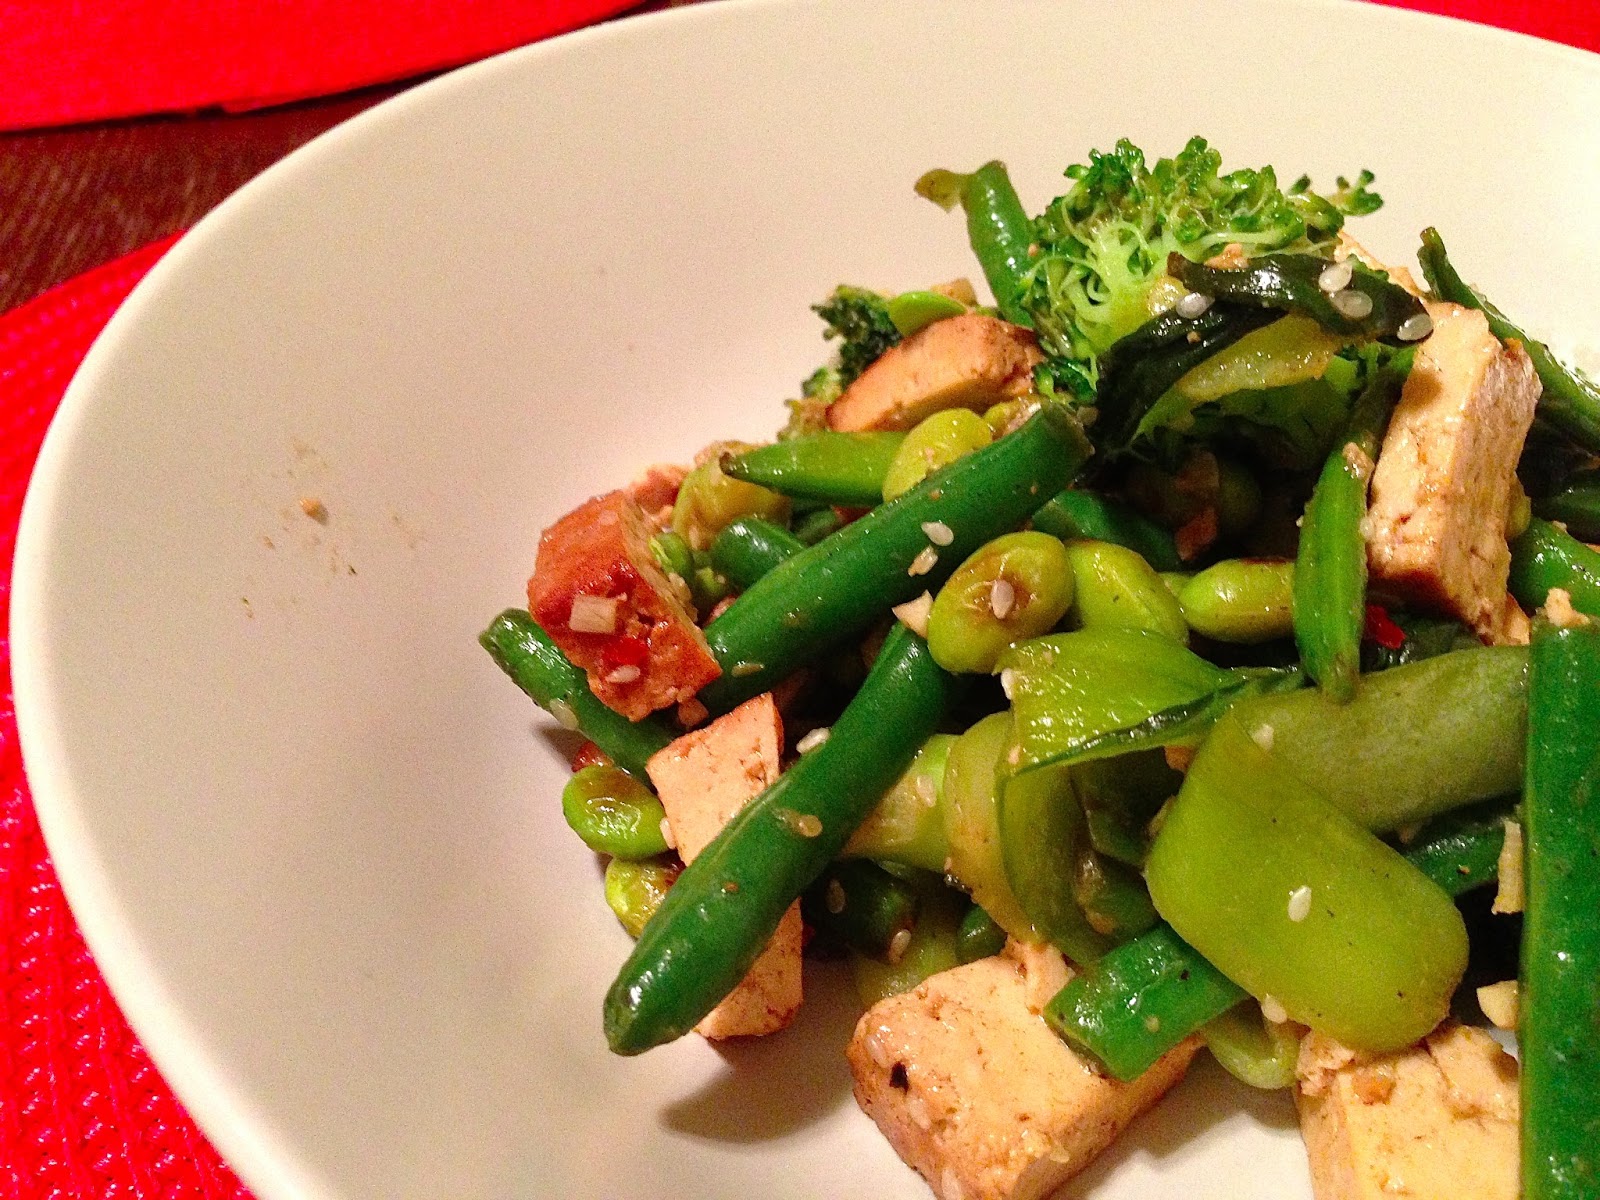
Sesame Ginger Green Machine Stir Fry

I didn't realize this stir fry was rather monochromatic until all the veggies were in the pan! Well, if green veggies are good for you, then this recipe takes the cake!

This recipe makes 2-3 smaller servings.

Green Machine Veggie Stir Fry
By Caroline Mac
Ingredients:
1 c green beans, cut into pieces
1 1/2 c broccoli florets
1/2 cup edamame
1/2 c sugar snap peas
1-2 small heads bok choy, cut into large pieces
1 recipe of spicy sesame ginger sauce
1 square of baked tofu, cut into small pieces
Canola oil for cooking


Step 1: Add small amount of canola oil to a pan and stir fry/ saute all veggies over medium-high heat until tender. I prefer my veggies a little bit crunchy, but you can go as long as you want until you reach your desired texture.


Step 2: Reduce heat and add tofu and sauce. Stir until ingredients are thoroughly coated and tofu is heated through. Serve hot.

Note: Though I didn't include it in the recipe, you can serve the stir fry over noodles, rice, or another choice of grain. 

Enjoy!


Sunday, December 9, 2012

Caprese Eggplant

This recipe is looong overdue. Even though I have cooked lots and lots of recipes, I haven't prepared many for more than a couple people at a time. This Caprese Eggplant was one of the first dishes I made for an entire party of people! Might I add that my creation was very successful? 

My inspiration for this tasty finger food was a traditional Italian caprese panini. I've yet to meet someone who doesn't like the classic grilled mozzarella, tomato, and basil sandwich. My adaptation was to remove the bread and instead place the fillings on thin slices of grilled eggplant. The result was a healthy, colorful, and flavorful side dish!

Caprese Eggplant
By Caroline Mac
Ingredients:
1-2 large eggplants, thinly sliced
1 roll of fresh marinated mozzarella cheese, sliced (make sure there are enough pieces for each slice of eggplant. My favorite is the Trader Joe's brand)
Enough fresh basil leaves to top each eggplant slice with 1 or 2 leaves
1 package fresh mini heirloom tomatoes, sliced
Olive oil
Italian seasoning to taste

Step 1: Brush both sides of an eggplant slice with olive oil. Place on a grill or pan over medium-high heat. Grill first side until it begins to brown. 

Step 2: Flip the slice and immediately top with mozzarella and seasoning. Continue to grill until cheese begins to melt and eggplant begins to brown on second side. Remove from heat and place 1-2 basil leaves and 1-2 tomato slices on the eggplant.

Step 3: Repeat for every slice. Serve warm or cold.

Enjoy!


Sunday, October 7, 2012

Pumpkin Mac & Cheese

It's pumpkin season! One of my favorite seasons, to say the least. I'll leave my description of this recipe to a few words: It turned out to be absolutely delicious! This is a great alternative to macaroni and cheese and is a wonderful seasonal dish.

Pumpkin "Mac and Cheese"
Adapted from Peachy Palate

Ingredients:
1 box Quinoa pasta
2/3 cups pumpkin puree
1 cup unsweetened almond milk
1 can cannellini beans drained and rinsed, 4 T reserved
1c cherry tomatoes
1t whole grain mustard
Lemon pepper to taste
Dash of Italian seasoning
1/4t salt
1-2 T olive oil

Step 1: Cook pasta according to the directions on the box. Drain and set aside

Step 2: Blend pumpkin, milk, 4T beans, mustard, and all seasoning in a blender until smooth. Set aside.

Step 3: Saute tomatoes and the rest of the cannellini beans in olive oil until tomatoes are juicy and tender

Step 4: Combine noodles, sauce, and tomatoes and beans in a pan and heat on low until heated through. Serve Warm

Enjoy!


Monday, September 24, 2012

Sweet and Sour Tofu with Coconut Rice

Tonight was my first night of group cooking! Well, two person cooking. I had my friend Emily over for  dinner, who is also a vegetarian and also gluten-free! I eat gluten, but I was totally up for making a gluten-free recipe. This was a relatively elaborate meal, but it was so worth the extra effort. Better yet, I finally know how to make a delicious sweet and sour sauce! We both agreed as we ate this meal that it was delicious. Utterly delicious.

Sweet and Sour Tofu with Coconut Rice
Adapted from Peachy Palate
Ingredients:
Tofu
1 block extra firm, high protein tofu (Drained and cut into triangles)
1 red bell pepper, diced
1 orange bell pepper, diced
1/2 white onion
2 T diced pineapple
1/3 c bamboo shoots
1 T olive oil

Sauce
Note: Separate 1/3 of the sauce once made for cooking the veggies
4 1/2 T Rice vinegar
1 1/2 T cane sugar
3 T tomato Ketchup
3 t minced garlic
6 T pineapple puree


Rice
1 bag Trader Joe's frozen brown rice, defrosted/ cooked
1/2 cup lite coconut milk
3 t shredded desiccated coconut
1 t coconut oil
1/2 t black pepper
pinch salt

Step 1: Combine all rice ingredients in a mixing bowl and stir until rice is evenly coated and sauce completely mixed. Set aside. Reheat rice in the microwave for 40 seconds when everything else is ready.

Step 2: Combine all sauce ingredients and whisk until completely blended. Transfer to a sauce pan and heat until boiling. Stir constantly. Reduce heat slightly and continue to cook sauce until it thickens. This should take less than 5 minutes. Remove from heat and separate 1/3 of the sauce for the veggies.

Step 3: Coat the tofu with the remaining 2/3 of the sauce and set aside to marinate for 15-20 minutes.

Step 4: Once the tofu is marinated, add red bell pepper, orange pepper, and  half of the onions to a pan with olive oil. Saute until onions begin to go clear. Add the bamboo shoots, pineapple, and tofu. Cook until tofu begins to turn golden, constantly stirring (6-8 minutes).

Step 5: Add remaining sauce to the pan and stir until veggies and tofu are evenly coated. Let simmer for a couple more minutes.

Step 6: Serve tofu and veggies over coconut rice with a sprinkling of onion.

Enjoy!


Monday, September 17, 2012

Vegan and Nearly Raw Fettucini Alfredo


One of my favorite restaurants back in Portland is Prasad. It's a vegan cafe located within a yoga studio. If you're ever in the Pearl District, be sure to check it out. Prasad introduced me to a new raw and ultra healthy phenomenon: Veggie noodles. That is, vegetables cut in such a way that they are nearly pasta-like in consistency. The dish I had at Prasad was a zucchini noodle linguini with pesto and a cashew ricotta. It was delicious! Tonight, I made my own version of this tasty dish. I used my Zyliss julienne peeler to slice zucchini into pasta-like strips, made a cashew cream, and cooked up a veggie burger. The end result was delicious!
Vegan and Nearly Raw Fettucini Alfredo
Ingredients:
2 zucchinis
1.5 cups raw, whole cashews
1 cup boiling water
1 clove garlic
Pinch of salt
1t Italian seasoning
1 veggie burger (or one per person dining)

Step 1: Run cashews in the food processor until finely chopped. Add Cashews and water to a blender and puree until smooth and creamy. Add garlic, salt, and seasoning and blend thoroughly. 

Step 2: Using a julienne peeler or spiralizer, cut long, thin strips of zucchini so it resembles noodles. Set aside.

Step 3: Cook your veggie burger according to the directions on the package. I used a Dr. Praeger's California Veggie Burger.

Step 4: Dish out zucchini noodles and toss with sauce to taste. Top with a crumbled veggies burger.

Enjoy!


Wednesday, September 12, 2012

Balsamic Beet and Carrot Salad

Hi all! It's been FOREVER since I've posted a recipe, so I figured I'd stop being lazy and post something. I had a bunch of beets from Trader Joe's in the fridge, so I decided to use them up.


I don't think I used as many veggies as the original recipe called for, so there was a lot of excess dressing. Just know that you may have some tasty dressing left over to use on future salads.

Balsamic Beet and Carrot Salad
Adapted from Simple Spoon
Ingredients:
1 package Trader Joe's pre-cooked beets (or 3-4 cooked beets)
1-2 cups baby carrots
1/2 cup raw almonds
Crumbled Feta cheese for topping
1T agave syrup
Sea salt

Dressing:
1/3 cup olive oil
1/4 cup balsamic vinaigrette
15 basil leaves, shredded
2 cloves minced garlic

Step 1: Heat saute pan to medium. Add almonds and cook until fragrant, stirring regularly but not constantly. Once they've darkened slightly and are fragrant, turn off heat and add agave. Stir until almonds are evenly coated. Sprinkle with salt. Transfer to a clean plate. Syrup will solidify, creating candied almonds!

Step 2: Steam baby carrots until al dente.

Step 2: Add all dressing ingredients together and mix until homogenous. Drizzle beets and carrots with dressing and top with feta cheese and almonds.

Enjoy!

Thursday, September 6, 2012

Lemony Lentil Soup

This may be one of my favorite recipes I've ever made! I love soup and wanted to make something quick the night before the ballet program started. There ended up being enough left over to have for dinner another night and a half, which made life easier too. I started with a recipe from Anja's Food 4 Thought, but ended up altering a lot of proportions and ingredients to accomodate what I already had. However, I did follow her cooking directions, which were great as always. This soup would probably be good chilled as well, but I haven't tried that.

Lemony Lentil Soup
Ingredients:
4 cups low-sodium vegetable broth
2 c cooked lentils
1 red onion, finely chopped
2 c chopped spinach
1.5 celery stalks, sliced
Olive oil for sautee
2 cloves garlic, minced
1t curry powder
1t cumin
1t Singapore seasoning
1/2t cinnamon
2 1/2 T lemon juice


Step 1: In a large pan, saute onions, garlic, and spices in olive oil on medium-high heat until onions are tender. Stir in celery, lentils, lemon juice, and vegetable stock.

Step 2: Let simmer, covered, for about 20 minutes. Add spinach. Let cook uncovered for another 5 minutes.

Enjoy!


Saturday, August 25, 2012

Creative Hydration

Because of the ballet intensive I've been in for the  past two weeks I've been seriously slacking on my blogging duties. I honestly have not cooked at all, mainly because I didn't want to be on my feet any longer than necessary. As a result, I sat on the floor icing my feet while my mom whipped up dinner. Despite my lack of food experimentation, I was able to mess around with hydration.

I am definitely not an avid water drinker. I tend to stick with teas, Vitamin Water Zero, Zevia, Kombucha etc. I simply don't find water particularly interesting, which results in me not drinking it as much as I should. Lately, though, I've been trying to avoid the vitamin water and hit the regular water... but in an tasty way: Infusion! The basic idea of infusing water? Combining flavorful fruits and herbs in water to make it more interesting and enticing. I've read a lot of articles and have found many websites providing yummy recipes (One good one is fruitinfusedwater.com). I even purchased a special pitcher that has a place to put fruit, herbs, vegetables, and whatever else I may want to use to flavor my water. I haven't made any set recipes yet, because there really isn't a set recipe to use! Here are a few flavor combinations that have been good so far.

Cucumber and Watermelon Infusion
~ Combine lemon juice, about 1 cucumber, sliced, and chunks of watermelon in a pitcher of cold water.
~ You can mash up the watermelon a little to help the flavor spread
~ Let the water sit for a few hours, and enjoy!
~Water will last for a while an you can refill the pitcher a few times, leaving the same ingredients. Just keep an eye on the fruit, making sure you toss it before it starts to rot/ taste bad.

Cucumber, Lemon, and Rosemary Infusion
~ Combine slices of fresh lemon, cucumber, and a few sprigs of rosemary to create a refreshing summer drink!

Here are a few other ingredients that I plan to mix and match in the near future...
~Oranges
~Strawberries
~Lime
~Raspberries
~Basil
~Mint
~Ginger
~Grapefruit

Hope this helps make hydrating a bit more interesting!


Monday, August 20, 2012

Vegan Ratatouille

Saturday was a big cooking day for me. I made my Garlic Green Beans with Lemon for the potluck the next day, but also had to make something for dinner that evening. My mom had picked up some delicious summer squash earlier in the week and I wanted to make something that incorporated the colorful veggies. My mom suggested making a ratatouille. I thought that sounded great and went ahead with it! I can't give a definite recipe here, as I think it will vary from kitchen to kitchen depending on the ingredients on hand. I will share the general recipe I came up with, though, and you can do the rest!

Summer Ratatouille
By Caroline Mac
Ingredients:
Variety of summer vegetables, chopped into large chunks (I used assorted summer squashes, red onion, eggplant, and cherry tomatoes)
2 heads of garlic, cloves peeled and left whole (Less if you're doing a small portion)
Olive oil to coat veggies
Italian seasoning
1 can cannellini beans, drained and rinsed
1 can Italian stewed tomatoes (canned), drained
Salt to taste

Step 1: Preheat oven to 350 degrees. Spread the fresh veggies and garlic in a large casserole dish. Drizzle with olive oil and mix until thoroughly coated. 


Step 2: Shake Italian seasoning over vegetables and mix again until evenly distributed. I was very generous with the seasoning, as I like a lot of flavor. Sprinkle veggies with salt to taste and mix again.

Step 3: Cover and bake for 1 hour. After 1 hour, remove from oven and spread beans and canned tomatoes over the veggies. Drizzle with olive oil and sprinkle with more seasoning. 

Step 4: Bake for 15 more minutes. Remove from oven and serve warm. 
Enjoy!

Sunday, August 19, 2012

Green Monster Smoothie

I've been wanting to try a green smoothie for a very long time. While some people stick their tongues out and gag when they see a smoothie the color of the grinch, my mouth starts to water. Smoothies are refreshing and perfect for hundred-degree weather like today. The main issue I have with smoothies, however, is that most smoothies sold in smoothie shops have so much sugar that they are no longer healthy. My Green Monster smoothie that I've created has no added sugar and is jam-packed with protein, fruits, veggies, and flavor. I will warn you, this smoothie isn't probably for someone looking for an ultra sweet, dessert smoothie. Yes, it is slightly sweet, but not excessively so. I'll definitely be making this one further down the line.

Green Monster Smoothie
By Caroline Mac
Ingredients:
1 cup frozen mango
1/4 cup frozen edamame
1 c spinach
1 T shredded, dehydrated coconut
2 T quick-cooking rolled oats
1/4 cup plain, nonfat Greek yogurt
1 cup Original soy milk, or other milk substitute

Step 1: Combine all ingredients in a blender and blend until smooth, thick, and creamy.

Enjoy!

Saturday, August 18, 2012

Garlic Green Beans with Lemon


I have a feeling this recipe is going to become one of my all time favorites. Tonight was my second time making these delicious green beans and I'm positive it won't be my last. This recipe requires quite a bit of prep, but it may seem like that simply because I tripled it today for a potluck. Thus, I had to zest and juice three lemons, peel and slice nine cloves of garlic, and chop the ends off of more green beans than I can count. I think it was worth it, though. This dish works great as a side or as a salad. You could also make only the dressing and use it on a regular basis for roasting veggies or as a salad dressing. This dish can be served hot, cold, or any temperature in between.

Garlic Green Beans with Lemon
Adapted from Vegalicious Recipes
Ingredients:
3 cups fresh green beans
1 lemon, zest and juice (separate some zest for garnish)
2 T olive oil
3 cloves of garlic, thinly sliced
Salt and pepper to taste
1/2 cup sliced almonds, or to taste

Step 1: Cut the tips off of the green beans and steam until al dente. Drain and set aside.

Step 2: Heat the olive oil in a small sauce pan. Once heated, add the garlic and saute until golden.

Step 3: Add the lemon juice to the pan, followed by the zest, salt, and pepper. Stir until thouroughly mixed and heated.

Step 4: Transfer the green beans to a large bowl. Pour the dressing over them and mix until evenly coated. Add the almonds and mix well. Garnish with extra lemon zest.

Enjoy!

Wednesday, August 15, 2012

Pesto Coated Beans and Cous Cous

Tonight's dinner was one of my first completely original recipes, and I really enjoyed the final outcome. I'm a huge pesto fan and I could eat it on everything. Combined with the chewy Israeli cous cous, sauteed fresh veggies, and beans, the dish makes for a healthy and hearty dish. I was very happy with the pesto, as I didn't use completely conventional ingredients (though it was pretty close to the classic recipe). Despite the tasty pesto and wonderful cous cous texture, my favorite part had to be the tomatoes. After they were sauteed, the tomatoes took on a juicy and extremely sweet quality. They practically burst in your mouth as you bite them, and add great contrast to the texture of the beans and cous cous. This dish could also be served chilled as a summer salad.

Pesto Coated Beans and Cous Cous
Ingredients:
Dressing:
2 1/2 cups fresh basil
2 T avocado
1 clove of garlic
1/4 cup walnuts
1/2 cup olive oil
2 T lemon juice
1 t whole grain mustard
Flower pepper to taste

1 1/3 cups uncooked Israeli cous cous
1 can great northern beans, drained and rinsed
1 can kidney beans, drained and rinsed
1 T shallots, chopped and separated
1 1/4 cups chopped carrots
1 cup golden cherry tomatoes
1/4 cup chopped basil
Whole basil leaves for garnish
2 T olive oil

Step 1: To make dressing, process all dressing ingredients in a food processor until completely blended.

Step 2: Prepare cous cous according to directions on the package, adding 1 tablespoon of shallots to the pot. Once finished, set aside.

Step 3: Heat olive oil in a large pan on medium-high heat. Add carrots and other tablespoon of shallots and sautee until carrots begin to soften. Add tomatoes and saute until they become soft and juicy, stirring the whole time. The tomatoes took me about 5-7 minutes.

Step 4: Add the beans and chopped basil to the vegetable mixture and stir until completely heated through. Reduce heat to medium-low. Once heated, add the cous cous and stir until thoroughly mixed. Finally, stir the pesto in with the cous cous mixture until everything is evenly coated.


Step 5: Serve warm, topped with fresh basil leaves.

Enjoy!


Tuesday, August 14, 2012

Simple Cold Quinoa Salad

In my opinion, lunch is the most easily monotonous meal. At lunchtime, I almost always seem to be in a hurry, out and about, or don't feel like making something super complicated and gourmet. I tend to find myself consistently eating veggies and hummus, some kind of whole grain, and some kind of fruit. Consistently, meaning it's what I had for lunch nearly every school day this past year. That's a lot of veggies with hummus. Don't get me wrong, I still love that combination and am not opposed to having it, but there must be more options to make lunch a little more interesting, right?

The answer is yes. Last night, I decided I no longer wanted to have the same-old same-old for lunch. I'm in the middle of a ballet intensive at my studio, which means packing a lunch every day or buying it from the food co-op near my studio. Even though I could easily get something new and exciting for lunch there each day of the week, I don't see the point in buying more food when there's plenty in my own kitchen to work with! So, I threw together a quick little cold quinoa salad for my lunch today. It was incredibly refreshing to have after class and was packed with protein to last me through a few hours of rehearsal.

I wasn't planning on posting this recipe at all, since it's so simple, but one of my friends tried a bite, liked it, and asked for the recipe. This one's for you, Lucas!

Cold Quinoa Salad
Ingredients: You can mess around with quantities until you find a balance you like. You can't really go wrong here!
1-1.5 cups cold, cooked quinoa
1-2 T sun dried tomatoes

1/4- 1/3 cup edamame (fresh or frozen and thawed)
Balsamic vinegar and olive oil to taste (About 1 T each)

Step 1 (the only step!): Combine all ingredients in a bowl, mix until evenly coated with olive oil and vinegar.

Enjoy!

Monday, August 13, 2012

Vegan Beet Crust Pizza

Tonight's meal was a meal full of firsts. These firsts included working with beets, making "pizza dough" from scratch, attempting a balsamic reduction, and discovering that my dad actually does enjoy beets as long as they're disguised in something else!

I found this recipe while combing through one of my favorite blogs, Vanilla and Spice. I couldn't resist trying this recipe, simply because of the sheer originality. Overall, I loved the result. It's definitely not your typical pizza, but it sure is tasty! The beet crust was delicious and was actually quite crusty and bread-like. I loved the way the beet greens and parsley were paired with hummus as the topping instead of the typical mozzarella and marinara.

The only problem I encountered while making this was the balsamic reduction. Vanilla and Spice didn't go into much detail when describing how to make this sauce and it resulted in my burning it slightly. Apparently you're only supposed to let the balsamic vinegar simmer for four or so minutes, but I let it go for about fifteen. It still tasted pretty good regardless, but I'm sure it would have tasted even better if I had done it correctly. For future cooks' sake, I've included a link to more detailed instructions on successfully making a Balsamic Reduction.

One more note to those planning on trying this: This recipe does not make a big pizza. The final pizza makes one small pie of about four slices. If you are planning to feed more than two or three people, then you should double or triple the recipe.

Vegan Beet Crust Pizza
From Vanilla and Spice
Ingredients:
Crust
1 cup unsalted sunflower seeds
1 raw beet, cut into small pieces
 2 T chopped fresh parsley
1/2 clove garlic
1 T coconut oil
Pinch of salt
Topping
2 cups chopped beet greens
3 T balsamic vinegar
1/4 cup hummus
Fresh parsley

Step 1: Preheat the oven to 300 degrees F. Process sunflower seeds in food processor until finely ground. Add the rest of the crust ingredients and process until mixture forms into a sticky ball. You may need to scrape down the sides occasionally once the dough gets really sticky.

Step 2: Grease a baking sheet. Place the beet dough on the sheet and spread with a spatula into a circle about 1/4" thick. Pinch the edges up to form a crust around the edge.

Step 3: Bake crust for 25 minutes.

Step 4: While the crust is baking, bring a large pot of water to boil. Put the beet greens into the water and boil for abou 4 minutes. Remove from water and immediately douse in cold water. Drain, and dry the greens.

Step 5: Make the balsamic reduction by following the directions on Cookthink.com.

Step 6: When crust is done, remove form the oven and let cool for a few minutes. Spread hummus on crust and follow it by drizzling it with the balsamic reduction. Finally, spread the beet greens over the crust.

Step 7: Bake the pizza for another 20 minutes, let cool, and top with fresh parsley. The crust is a bit fragile, but I could still eat the slice by just holding it.


Enjoy!


Wednesday, August 8, 2012

Garlic Green Beans with Lemon

This was one of my first legitimate cooking attempts and this recipe remains one of my favorites. I'm a fan of lemon and garlic. Combined, they are delectable. I will warn you: once you start eating these green beans, you cannot stop. This dish is great as a side, or you could even saute a wider variety of veggies, double the sauce, and make a warm salad!
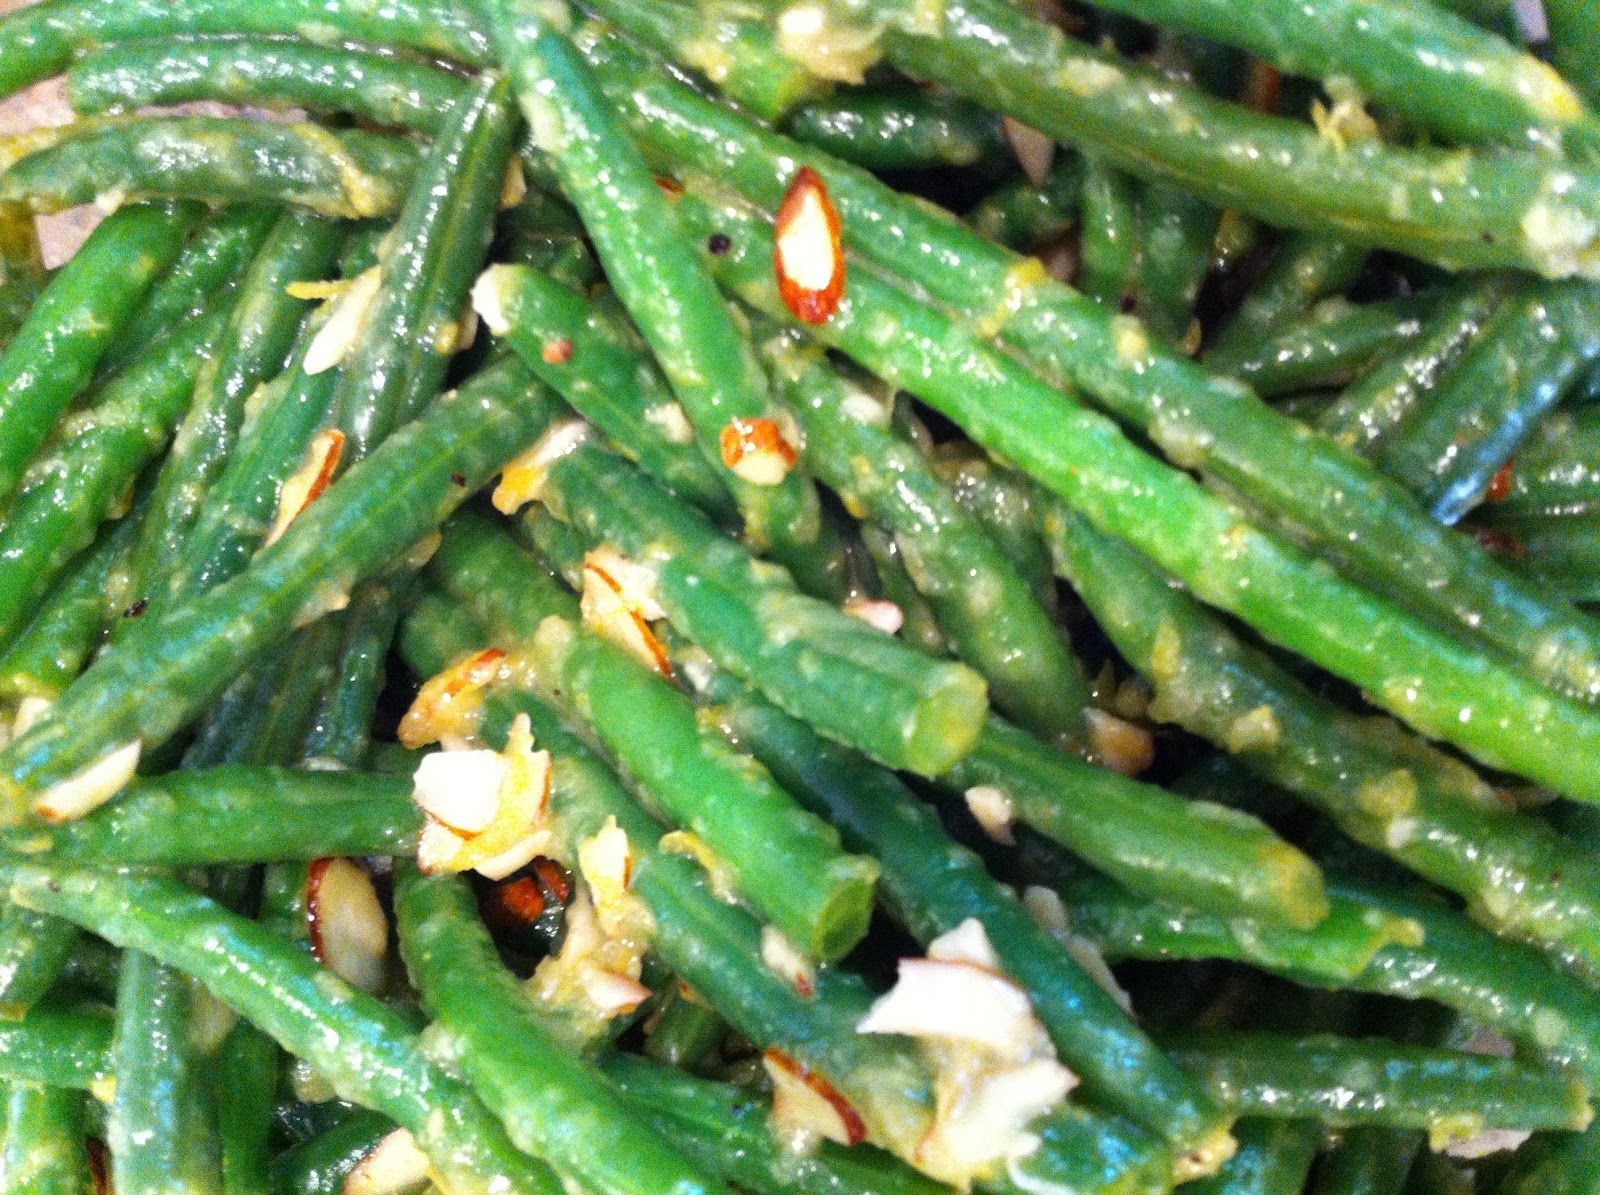
Garlic Green Beans with Lemon
Adapted from Vegalicious
Ingredients:
1lb fresh green beans
1 lemon, juiced and zested
2T olive oil
3 cloves of garlic, thinly sliced
Salt and pepper to taste

Step 1: Steam the green beans until they are tender, but make sure not to overcook.

Step 2: Heat the oil in a sauce pan. Add the garlic and stir until it becomes golden (about 2-3 minutes).

Step 3: Mix the lemon juice in with the olive oil and garlic. Add salt, pepper, and zest (save a little lemon zest for garnish)

Step 4: Mix sauce with the green beans. Serve warm.

Enjoy!